
If your website firewall (for example, Cloudflare) blocks or slows down the Verified CONSENT crawler, you can whitelist its user-agent. This ensures our audit can run smoothly without being throttled or blocked.
Two-step summary of what’s needed:
1. Create a Firewall Rule
- Ask your development team to whitelist the Verified Data crawler in their firewall.
- Do not whitelist our Crawler IP addresses as these can and do change.
2. Set the Correct User-Agent within your project
- If you’re creating a new audit project:
When setting up a new project, choose “Advanced” as the browser type in Step 2. - If the project already exists:
Copy the existing project and choose “Advanced” as the browser type in Step 2. You can then delete the original project with the blocking issues.
Further details…
1. Creating the Firewall Rule
For example, with Cloudflare, ask your web development team to create a rule for allowing the access for our user-agent “verified-data.com” as follows:
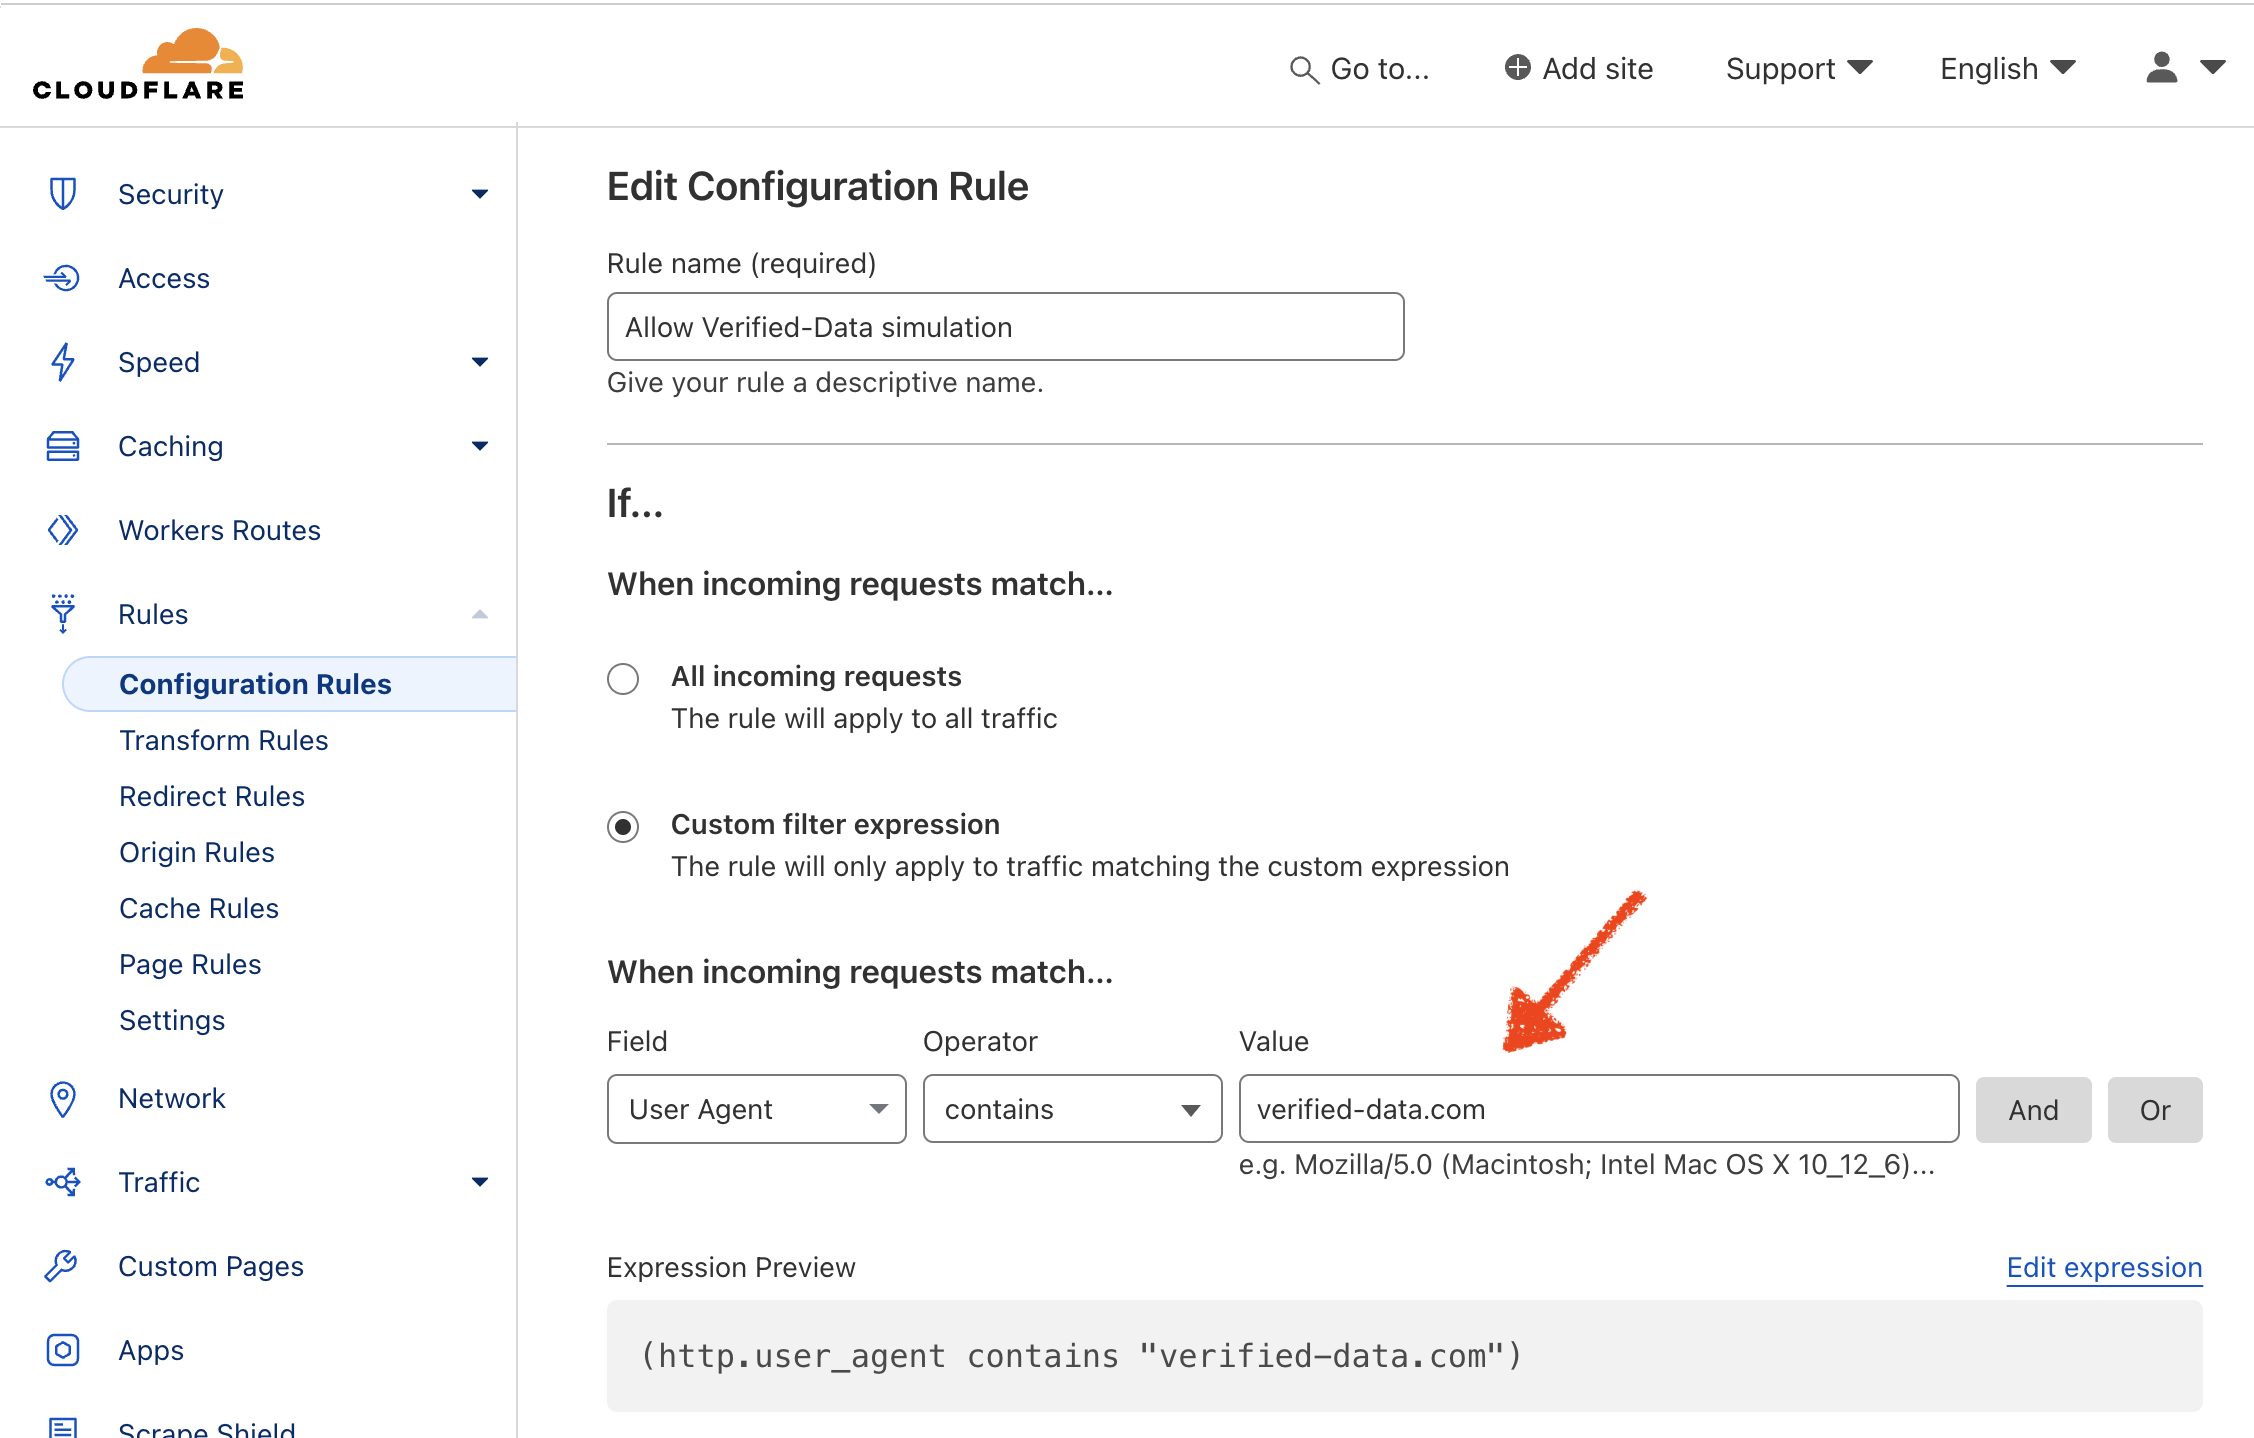
Cloudflare whitelist rule
2A. Creating a New Audit Project
If the web development team has whitelisted our crawler, create the Verified CONSENT project and ensure Advanced is selected as the Browser Type in Step 2 of the project set up.
Note: It is important to have the whitelist rule in place before creating the project.
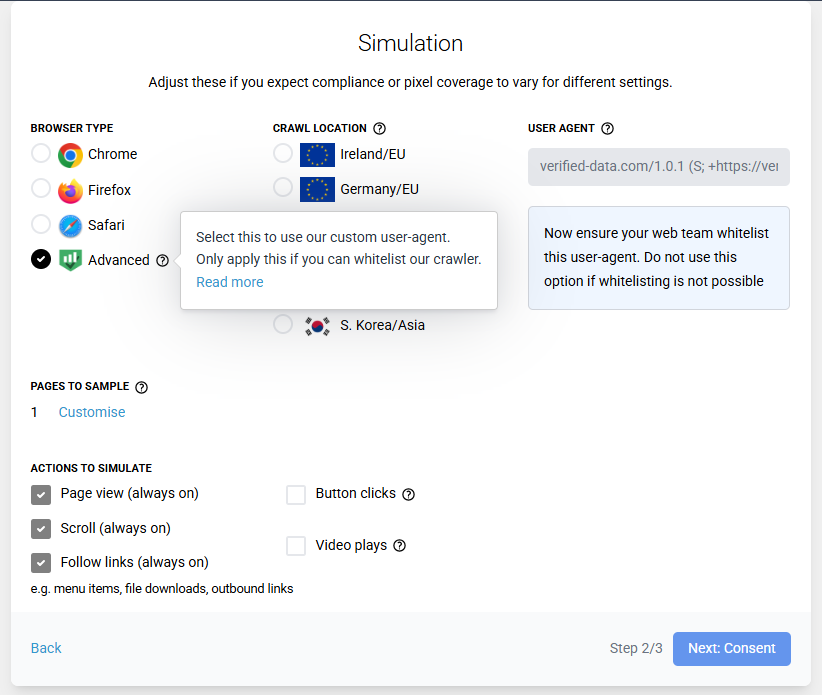
Setting the correct user-agent when creating a new project
2B. If the Project Already Exists
For an existing Verified CONSENT project that has been blocked (because our crawler was not whitelisted beforehand), copy the existing project and select Advanced as the browser type in Step 2. You can then delete the original project with the blocking issues.
Typical crawler message that requires the site to be whitelisted by the web development team:
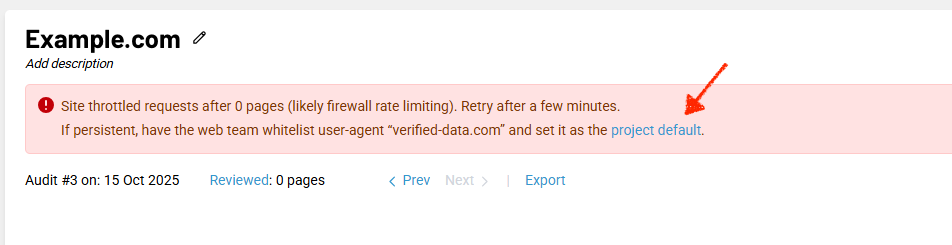
If our crawler is being blocked, ask the web development team to whitelist our crawler.

A high percent of pages returning 4xx/5xx responses, is likely due to crawler blocking.